
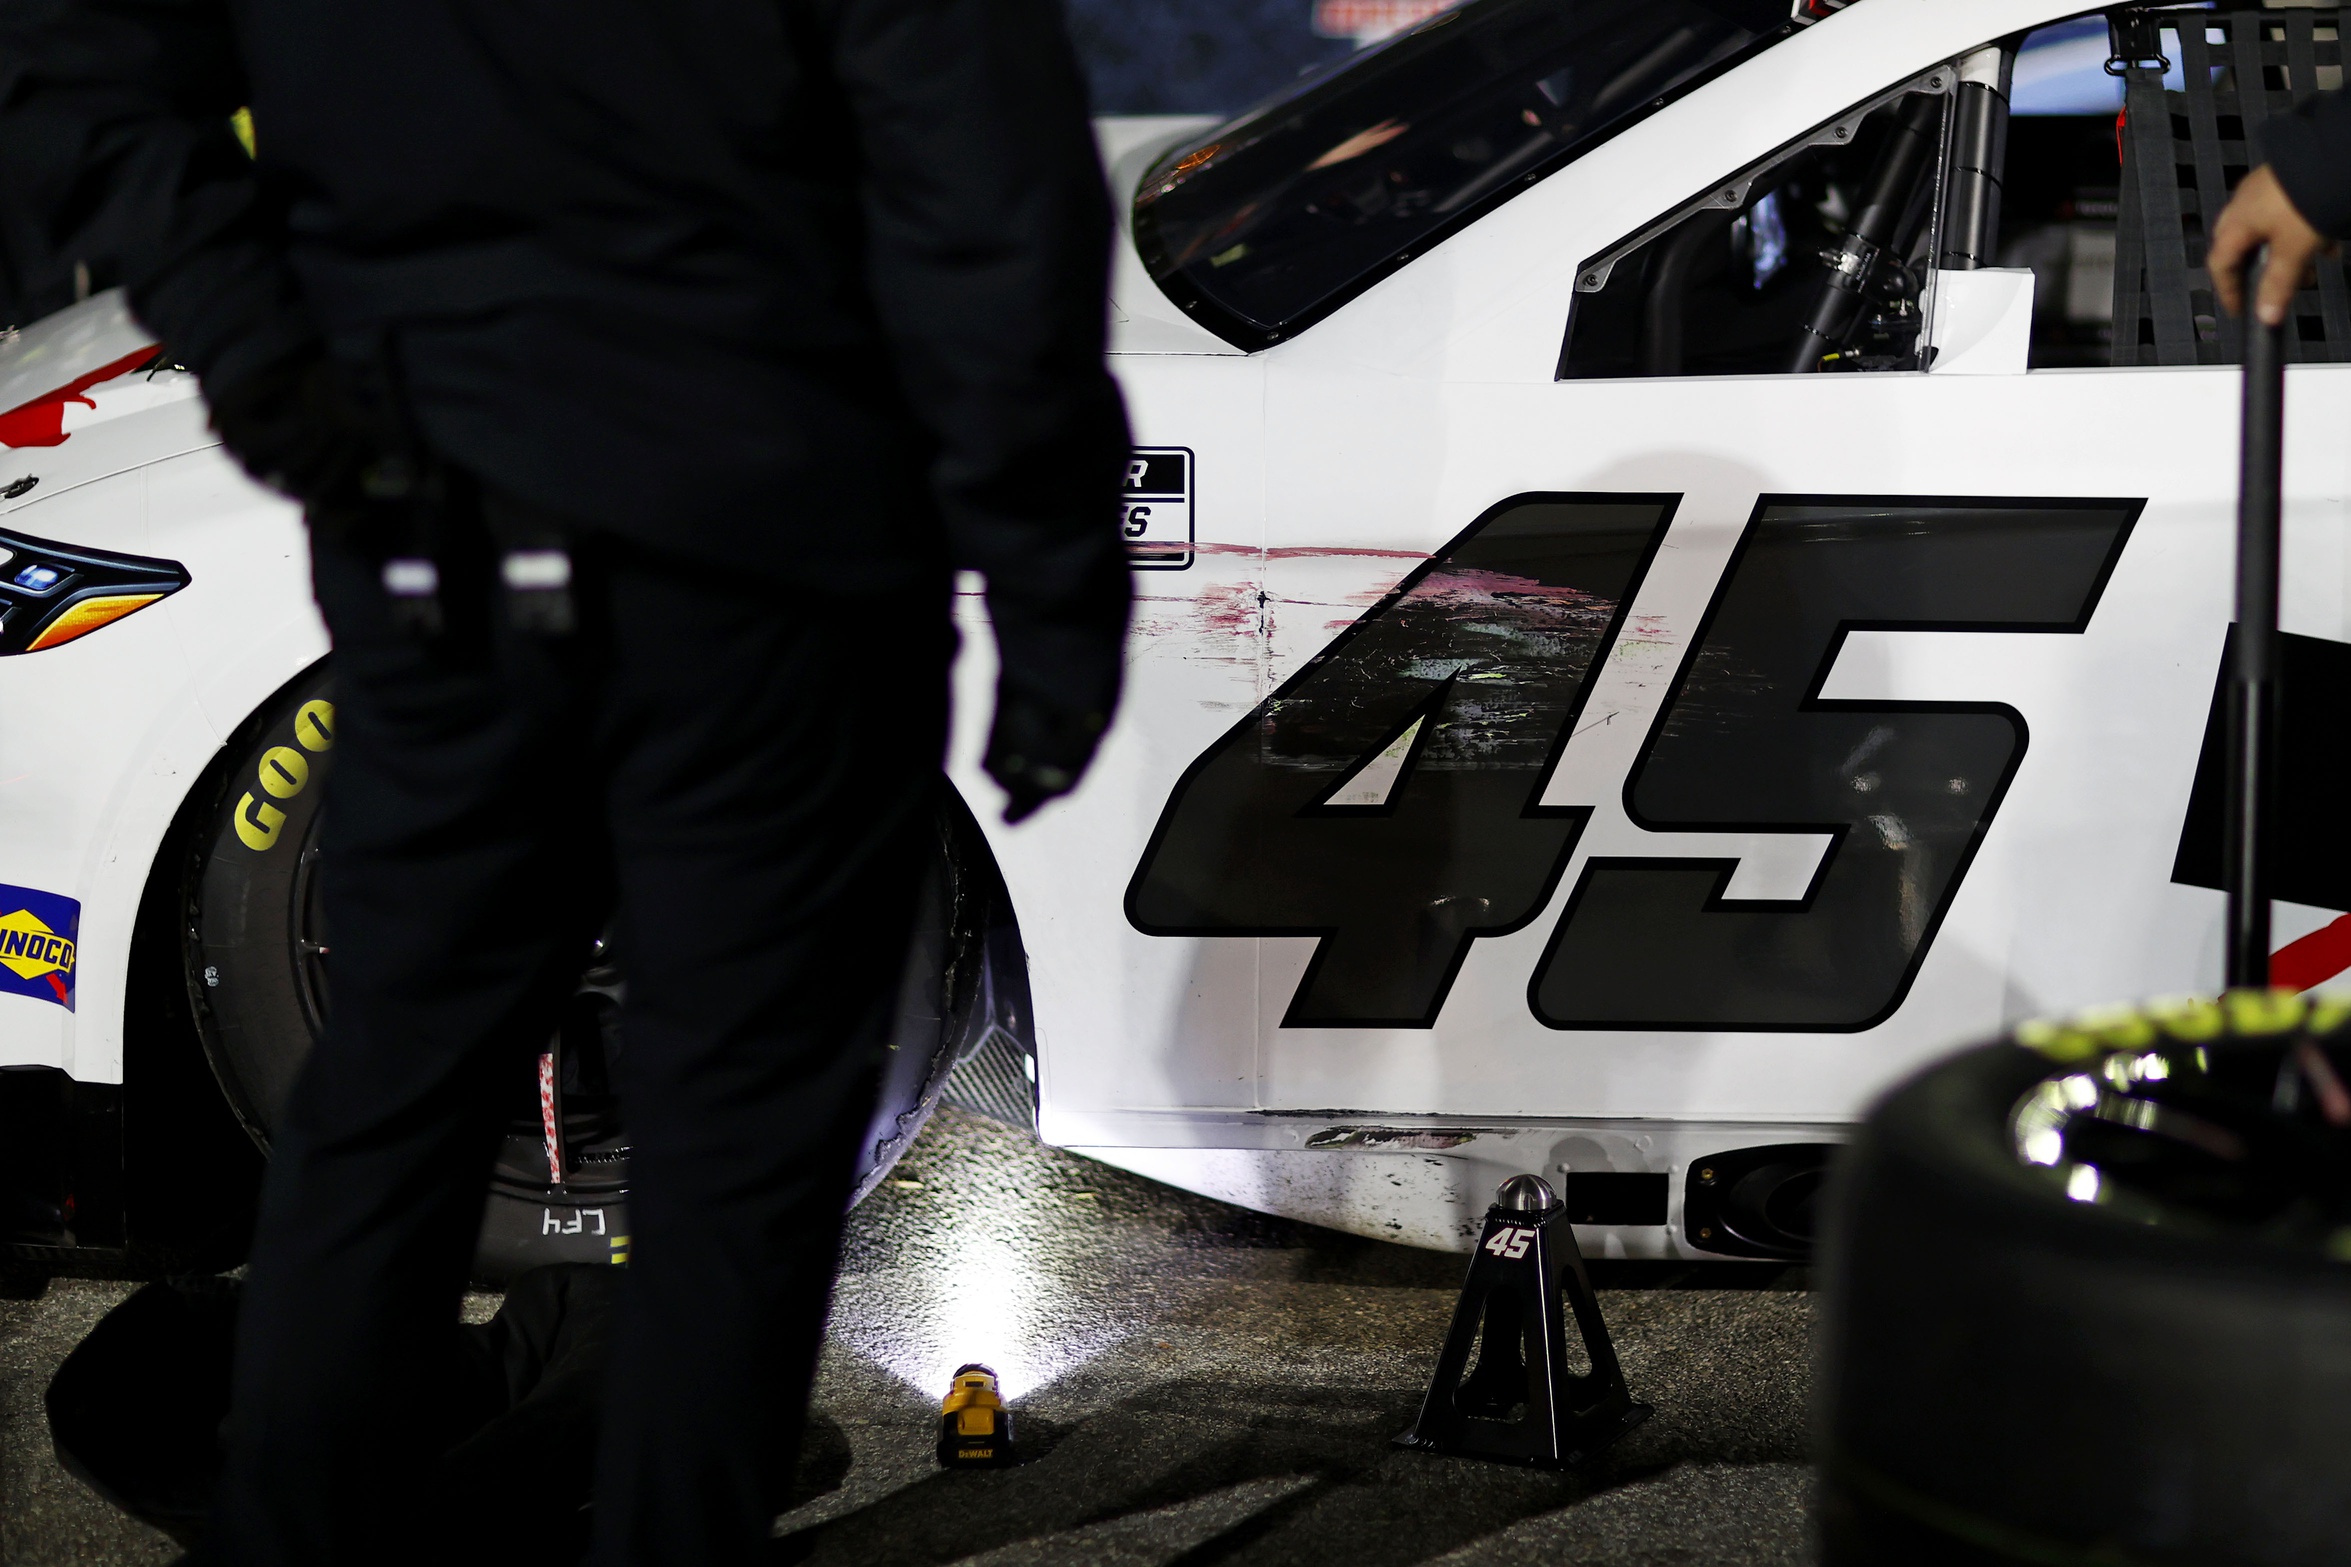
Bowman Gray Stadium lived up to its “Madhouse” reputation, and Tyler Reddick learned that the hard way. After starting on the front row following a dominant heat race victory, the 23XI Racing driver looked poised to contend for the win. But as the night unfolded, mechanical gremlins and handling issues derailed his momentum, leaving him frustrated yet determined.
While Reddick clawed his way to an 8th-place finish, the No. 45 team is left wondering what could have been.
Bowman Gray vs. The Coliseum—A Whole New Level of Intensity
For Reddick, the transition from the L.A. Coliseum to Bowman Gray was a brutal wake-up call.
“Just a lot more intense,” Reddick said, describing the major differences between the two tracks.
Unlike the Coliseum, where drivers can lean on each other more aggressively, Bowman Gray’s tighter, more technical layout demanded precision over brute force.
“There’s not as much room to really get physical with one another,” he explained. “You do that in L.A., but here, the amount of room you have is a lot less. You really have to lobby for position on the racetrack.”
That extra level of tightness made every pass a high-risk maneuver, forcing drivers to rethink their strategy lap after lap.
The Turning Point: A Car That Never Fully Recovered
Reddick’s first 100 laps were strong, and he felt confident in his ability to challenge for the lead. But everything changed after the halfway caution.
“Second half, you know, I was feeling really good. Thought I could get the lead, or try to get the lead… I didn’t feel like I was being that aggressive, but I don’t know.”
Unfortunately, after repairs were made to his Camry, something felt off—and his car was never the same.
“After we had all those repairs and we finally got going, my car just… was just not quite safe,” Reddick admitted. “It just got really, really tight. So we had a bad spot there, just really slow.”
From that point on, Reddick was fighting an uphill battle. While he salvaged an 8th-place finish, he never regained the peak speed and control he had in the first half of the race.
The Bottom Line—How Ryan Blaney’s Strategy Caught Reddick’s Attention
One of the biggest surprises of the night was the success of drivers utilizing the bottom line—something Reddick and others initially struggled with.
🚀 Ryan Blaney, who stormed from 23rd to 2nd, was the prime example of this.
“They said he was running the bottom really good,” Reddick noted. “In a place like this, the window is very narrow. I think if you can get it right, you can find a way to the front.”
While Reddick and Denny Hamlin found some success running the high line, it was Blaney’s ability to “wrap the bottom” that helped him make game-changing passes—a strategy that Reddick will undoubtedly study moving forward.
Takeaways from Reddick’s Tough Night
While the race didn’t end with a trophy, Reddick’s determination and adaptability were on full display.
📌 Bowman Gray is unlike any track he’s raced before—the tight quarters and intense battles made every move critical.
📌 Mechanical issues cost him a shot at victory—his Camry never felt the same after repairs, highlighting how setbacks can make or break a race.
📌 The bottom line matters—drivers like Blaney proved that mastering the lower groove can be a game-changer at short tracks like Bowman Gray.
For Reddick and the 23XI Racing team, this race was a lesson in perseverance and race strategy. While it may not have been his night, the experience will be invaluable as the season progresses.
Final Thoughts: A Step Back, But Not a Setback
Tyler Reddick’s Bowman Gray debut was a rollercoaster—from starting on the front row to struggling with a tight car in the second half. But despite the frustrating result, his ability to grind out a top-10 finish shows his growth as a driver.
Will he use this experience to improve at future short tracks? Given his adaptability and hunger for success, expect Reddick to bounce back in a big way.
Daytona is next—and redemption is on his mind.


